Nezumi Testing is the fifth main area in Lost In Vivo.
It is split into two major zones; the first area contains the labs, offices, and holding area, along with the Rat Men; the second area is dedicated to storage, where the player encounters Sotiris. There is also an optional sublocation between them, the Rat Fluid Pipes.
Walkthrough[]
Research Area[]
The goal in Access Floor 1 is to get through the door with a retinal scanner while avoiding the Rat Men.
Before anything else, it is recommended that the player goes to Lab 2A first, as this lab contains Lost Tape 3.
In Lab 1A, one of the rat freezers contains the Doll Head, which much be taken to Holding 1A. Using a vise mounted to a table, the Doll Head can be crushed open, revealing a Picklock Set. From this point on, the main hallways will be filled with "woke" Rat Men, which will respawn every time the hallways are left and reentered.
Use the Picklock set to pick the Padlock and enter Dr. Brundle's office, where Dr. Piccinini's eyeless body can be found on the floor. After looking around the room, an image of the retinal scanner door will flash on the screen, revealing that it is now standing half-open. The player must run back through the hallways and through the retinal scanner door.
The Protagonist will be briefly reunited with Dani, where they can pet her to their heart's content; however, in order to progress, the player must open the next door, causing a wave of fluid to sweep Dani down into the pipes below.
The player can either continue on into the next rooms or interact with the broken drain enough times to be able to jump down into the Rat Fluid Pipes.
Storage Area[]
After a short series of rooms and passages, the player will find a room with a Save Station and Dr. Brundle's Personal Archive #92. The next door leads to the storage rooms proper.
The door leads to a large empty room, in the center of which Sotiris will appear for the first time. The door to the next area is on the left wall, locked behind another retinal scanner; to unlock it, an eye must be found. There are two other storage areas towards the back of the Storage Area with piles of meat, each of which must be examined; the second one examined will always have the left eye. Sotiris is only able to attack the Protagonist in the three storage areas, requiring the player to keep their eye on them.
There is another Save Station in the Storage Area, in the hallway after the first storage area.
The left storage area is a single room that holds a grid of large packages. The pile of meat is against the back wall, towards the left side.
The right storage area consists of two large rooms; the first holds a large number of packages of varying sizes, while the second is filled with hanging bags. The pile of meat is found on a table in this second room. After investigating the pile, the crates will rearrange, making the path back out more difficult.
Once the left eye has been obtained, walking back to the first storage area will trigger a cutscene of Sotiris inserting the other eye into their own eye socket. The main room is now filled with boxes, which the player must navigate through in order to reach the retinal scanner door and reach the Elevator.
Endings[]
See Endings
Nightmare Ending[]
Nezumi Testing is the first area that contains a step towards achieving the Nightmare Ending. Once the player enters Dr. Brundle's office and the open scanner door flashes on the screen, the prompt to examine the body is replaced with the option to pick it up. Doing so will greatly slow the player as more Unity errors appear in the bottom left. After a few seconds, the player's movement will return to normal, and Dr. Piccinini's body will be picked up. Looking in the Inventory reveals the item's name as "Eyeless_Body.fbx" and that the inventory is distorted and glitchy. The errors will disappear after walking out of the room.
The player must take Piccinini's body to the Storage Area, just before the Sotiris encounter, where a padlocked door and a Picklock Set can be found in the area. Attempting to grab the Picklock Set from the table will cause the text "Inventory Full" to appear, followed by Unity errors appearing and Piccinini's body falling to the ground; the player can now pick up the Set, and use it to enter the locked room.
The room itself only contains some Ruger Ammo; however, the farthest wall is now gone, and Piccinini's body is now standing upright in the path. He looks at the player for a moment before walking out of sight, in the direction of Sotiris. Using the Picklock Set on the door will reveal that it contains nothing but Ruger Ammo. Walking back out into the hallway will reveal that the body is staring at the player across the hallway before running out of view.
Neither the Picklock Set nor the Padlocked Door will appear unless Piccinini's body is picked up.
In The Last Area, a padlocked door can be found to the right of the Goobles' room. This is the only padlocked door after Nezumi, only unlockable if the player picked up the Picklock Set from the Storage Area.
Secrets and New Game +[]
See New Game +
NG+
Flesh Rays can appear in Lab 2A.
In Lab 1B, a Rat Man will enter the room shortly after the protagonist enters.
Sotiris becomes incredibly aggressive on higher NG+ difficulties, eventually becoming nigh-impossible to avoid without significant effort.
Secrets
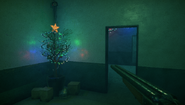
Nezumi Testing will become Christmas-themed if your system time is set to any day from December 15th to the end of the year. A dead potted tree will appear in the lobby, decorated with a star and Christmas lights; a slice of pizza appears at its base, which can be eaten (as opposed to the same slices of pizza found in The Sewers, which cannot be eaten). The hallways of the research area are decorated with fairy lights, the Rat Men will be dressed as reindeer and make jingling sounds as they walk, and even Sotiris puts on a Santa hat!
Trivia[]
- During the introduction, a magazine can be found lying on the ground that references Nezumi Testing, which suggests that Dr. Brundle managed to escape Sotiris.
- The underlined letters on the sign in the Entrance Hall spell the word "NESTING".
- The sounds of footsteps and doors opening can be heard every so often from the main rooms.
- Several cameras have an eye instead of a lens.
- A portrait of Specimen 8 can be found hanging on the wall in Holding 1A; a similar portrait can be found in the right branch of Royal Phantome Subway.
- Sotiris takes a moment to appear in the room; this may be a bug, but who really knows with this game?
- In the rightmost storage room, a canvas body bag can be seen on the ground through some crates. A similar bag is seen hidden in the Royal Phantome Subway.
- The eye cutscene will replay every time the player enters and leaves the Save Station.


